StoryMaker
Produce and publish professional-grade news
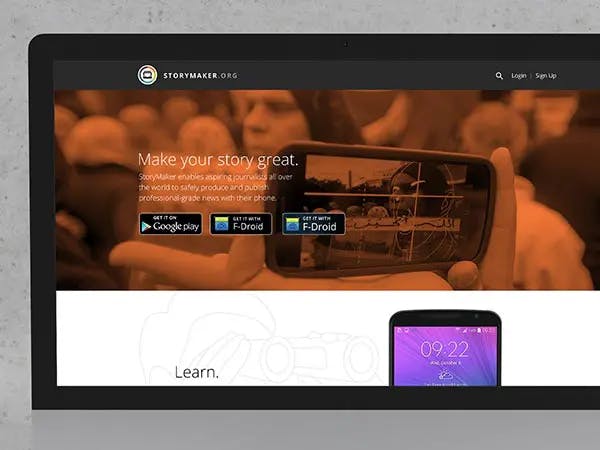
StoryMaker - Make your story great.
Creating great stories is now easier than ever with StoryMaker. Our unique templates, overlays, and lessons guide you through the entire creative process. StoryMaker lets you edit your content right on your mobile, making it even easier to finish your story. Once you've finished, StoryMaker lets you publish your story to all of your favorite platforms.
Download StoryMaker in the the Google Play Store.
Download StoryMaker in the the Google Play Store.
Setting up your development environment - prerequisites:
- Android SDK
- Working Android NDK toolchain
- Unix build toolchain. Linux and OS X are well tested.
Follow these steps to setup your dev environment:
- Clone the git repo, make sure you fork first if you intend to commit
- Init and update git submodules
$ git submodule update --init --recursive
- Ensure NDK_BASE env variable is set to the location of your NDK, example:
$ export NDK_BASE=/path/to/android-ndk
- Build android-ffmpeg
$ cd external/android-ffmpeg-java/external/android-ffmpeg/
$ ./configure_make_everything.sh
- Create SecureSHaredLib third party credentials file
vim ./external/SecureShareLib/SecureShareUILibrary/res/values/credentials.xml
- Add the following contents:
<?xml version="1.0" encoding="utf-8"?> <resources> <!-- insert your own keys from: https://www.flickr.com/services/apps/create/apply/ --> <string name="flickr_key">REPLACE_WITH_YOUR_KEY</string> <string name="flickr_secret">REPLACE_WITH_YOUR_KEY</string> <!-- insert your own keys following: https://developers.google.com/accounts/docs/OAuth2 --> <string name="google_client_id">REPLACE_WITH_YOUR_ID</string> <string name="google_client_secret">REPLACE_WITH_YOUR_SECRET</string> <string name="google_app_name">REPLACE_WITH_YOUR_APP_NAME</string> <string name="s3_key">REPLACE_WITH_YOUR_APP_NAME</string> <string name="s3_secret">REPLACE_WITH_YOUR_APP_NAME</string> <string name="s3_bucket">REPLACE_WITH_YOUR_APP_NAME</string> <string name="s3_path_prefix">REPLACE_WITH_YOUR_APP_NAME</string> <string name="sm_key">REPLACE_WITH_YOUR_SM_KEY</string> <string name="sm_secret">REPLACE_WITH_YOUR_SM_SECRET</string> <string name="sm_tor_host">REPLACE_WITH_YOUR_TOR_HOST</string> <string name="sm_tor_port">REPLACE_WITH_YOUR_TOR_PORT</string> </resources>- Create Google Play Developer Account credentials file
vim ./external/liger/lib/src/main/res/values/google_play.xml
<?xml version="1.0" encoding="utf-8"?>
<resources>
    <string name="base64_public_key">REPLACE WITH YOUR PUBLIC KEY</string>
    <string name="liger_salt">REPLACE WITH A STRING OF BYTES</string>
</resources>
Android Studio Specific Steps
After completing all items under Prerequisites:
- File -> Import Project -> Point to the root project directory
- (optional) Build from the command line
$ ./gradlew assembleDebug
How to update content packs
- update AVAILABLE_INDEX_VERSION in Constants:
$ gedit storymaker/external/liger/lib/src/main/java/scal/io/liger/Constants.java
- generate zip:
./content.py generate ; ./content.py zip_one_content_pack beta 6 ./content.py generate ; ./content.py zip_one_content_pack citizen_journalism_pack 2
- update records in available_index.json (version, size and hash):
$ gedit external/liger/lib/src/main/assets/available_index.json
- test:
./content.py push_test_files beta 6 ./content.py push_test_files citizen_journalism_pack 2
- upload zip to s3
- make public
Testing
We have a helper script "run-tests.sh" that should run the core tests
There are several test classes you can also run manually:
- DownloadAndPatchTest - downloads a content pack with a patch and verifies their content
- EndToEndTest.java - logs in before creating and uploading a new story
- HookPathsTest.java - checks all possible hook paths for dead ends
Please note that you must build with the "testing" branch of the liger(storypath) submodule to run DownloadAndPatchTest. To do this, follow these steps:
$ cd external/liger/
$ git fetch origin testing:testing
$ git checkout testing
To return to the "master" branch of liger (storypath) for a normal build, do the following:
$ cd external/liger/
$ git checkout master
Eclipse Specific Steps
!! This is outdated and probably doesn't work anymore
After completing all items under Prerequisites:
- run script to update all libraries android support library. from command line run in the top level of the repo:
$ scripts/copy-support-libs.sh
- Import dependancies into Eclipse
- Using the File->Import->Android->"Existing Android Code Into Workspace" option, import these projects in this order:
 external/HoloEverywhere/contrib/ActionBarSherlock/library/
 external/HoloEverywhere/library/
 external/NetCipher/
 external/android-ffmpeg-java/
 external/WordpressJavaAndroid/
 external/SecureShareLib/SecureShareUILibrary/
 external/SecureShareLib/SecureShareUILibrary/external/facebook-sdk/
 external/cardsui-for-android/CardsUILib
 external/SlidingMenu/library
 external/Android-ViewPagerIndicator/library
 external/RangeSeekBar/library
- Import the StoryMaker project from the app/ subfolder
- (optional) Build from the command line
$ cd app/
$ ./setup-ant.sh
$ ant clean debug
Repository Information
You can view this repository on GitHub here:
https://github.com/StoryMaker/storymaker
https://github.com/StoryMaker/storymaker
